Friday, March 11, 2011

Anthroplogie inspired Knotted bedding (from sadies blog)

Anthropologie inspired knotted bedding also inspired by kojodesigns!

{photo courtesy of Kojodesigns}
It is finally done!
I have been telling you all about this amazing quilt/comforter/bedspread that I have been working on and it is finally complete.
Let's just say it took me WAY longer than I thought it would.
It was ALL worth it though.
I have been searching and searching for a new comforter and a new look for our master bedroom and nothing jumped out to me...
until
I came across this amazing blog and found this tutorial!
Kirstin and Jordan are 2 of the most talented ladies I have ever seen!
There amazing blog is full of fabulous tutorial and positive posts.
{Kojodesigns} is {simply} amazing. You all must check it out.

I followed this {TUTORIAL} to make my dream bedding!

TA DA!

Please note:
The blog {Kojodesigns} is the brilliant mind behind this tutorial!

This was not my idea even though I wish I was this creative!

If you follow her tutorial {FOUND HERE} you will find the play by play instructions of how to make this bedding.

I am adding the little things I did different that worked best for me!
I made a queen sized bedspread instead of a king so I only bought the 'queen' size jersey sheet set.
That was a BAD idea. I totally ran out of fabric!
I had to buy another pack so I would just stick with the 'king' sized sheet set.
{Kojodesigns} explains that you will need to cut out 18"x18" squares of jersey.
For a queen I cut out 49 squares.

* I actually cut out an 18"x18" piece of cardboard which was extremely helpful.
I set it on top of the fabric and used my fabric roller cutter thingy...to cut the fabric.
After I had 49 pieces I started on the knots.
Kojodesign uses a fabric pen.
I didn't have a fabric pen...
So I drew a circle with my bowl with a highlighter.

Those 2 pictures are out of order...sorry for the ghettoness...yeah that's a word.
you can see from the picture that the highlighter shows through the fabric perfectly.
Kojodesign also uses embroidery thread which I highly recommend.
I didn't have any of that either so I just used normal sewing thread.
All I have to say is I hope it holds up!!
To learn how to make the knots go to the Kojodesign{TUTORIAL}!
She explains is perfect.
I think I may have done my knots a little different but as long as you sew it enough that it is secure and it has the look you want then it works.
I kinda just did what worked for me.
After you have hand-sewed 49 knots then your ready to piece and pleat together.
Don't get discouraged while your doing this.
This takes the most time.
I just did a few every night or every chance I could.
You want to piece together length before width. That way it will line up better.
Kojodesign has a great tip for this part!
She does 5 pleats per square.
Pinning 7 squares together.
This will make it so everything lines up perfectly as well.
I pleated each square individually then pinned it together.
It took a lot more time but I like the way it looked better than putting the squares together and pleating them at the same time.

Then when you piece the long strips together you have to pleat each square 5 times as well.
After I was done I needed to find an affordable yet comfortable down comforter.
I looked at TJ Maxx and Ross and found the perfect one at Ross for only $40.
I placed the quilt face down on the comforter and pleated and pinned it around the edges. Then sewed until there was one square left. Pull the comforter through so the squares are right-side out and sew the outside.
Go to the tutorial at {KOJODESIGNS} to have it explained better.
One more step!! You're almost there...
The gals at Kojodesign did 'sewing in the ditch' to finish it off but my down comforter was too big and my sewing machine was too small so I hand sewed each corner of the squares to my down comforter.
It was really easy for me to do because the comforter I got had squares sewn into the comforter.
Guess how many squares...7 down and 7 across!
It was meant to be.
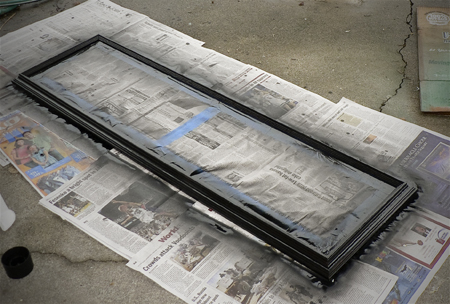
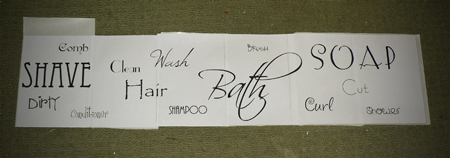
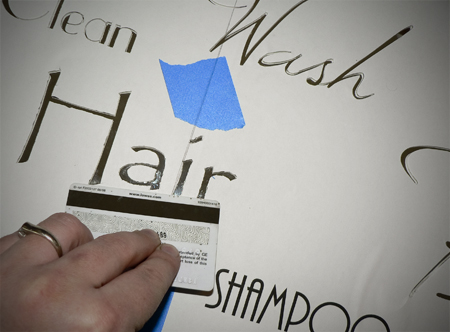
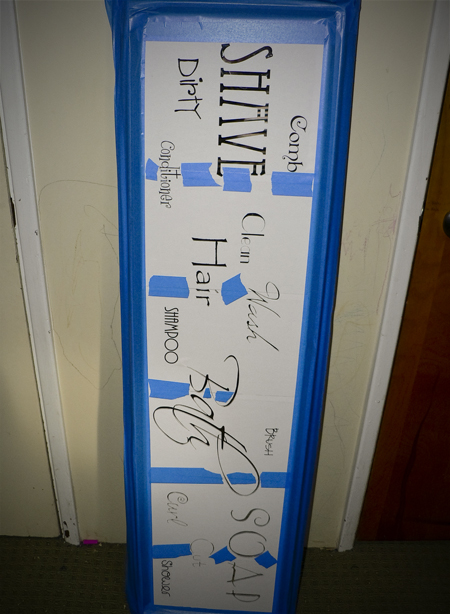
Stencil tutorial coming soon.
Try not to look to much at my room...it isn't completely done yet.
I am completely remodeling it.
Notice the yummy feather wreath and the fun candle holders.
Pictures and tutorials about those coming soon.
This bedding simply speaks to my soul.

Thursday, February 10, 2011

Valentines IDEA

TODAY I am going to share a FABULOUS idea Valentine’s Day is this coming Monday….are you ready?? 

This was SUPER easy to make – perfect if you are in a crunch trying to think up something fun to do for your man!  

You will need to gather the following materials seen in the picture below: a mini-muffin tin (with 24 “slots”), a cutting board and/or scissors, my FREE printables, & fun ribbon.

You all LOVE how beat-up my cutting board is, right?!?  We have been through a lot together!  {WINK}  OK – you will also need to gather magnetic tape & some kind of scrapbooking adhesive.  I like to use those dots they sell at scrapbooking stores.  It’s also optional if you want to round your corners & ink the edges of all of the cards.  It will look absolutely adorable without doing either of those two things….so no worries if you don’t have ink or a punch for the corners.

Your first step is to cut everything out.  I know, I know….you prob already knew that, huh!  Tee, hee.  I am a teacher by day & a crafty lady/expert flirt-with-my-man by night!  What can I say – I am used to being around FIFTH graders all day! :)

Now – you will need to use a powerdrill to create the holes in which the ribbon is strung through!  Yep, you heard me!  Don’t worry – this will just make you feel that much more powerful!  I grabbed our drill and created holes that were about 5 1/2 inches apart.  {Hint: I would use a ruler & mark two dots with a marker at the exact places you want to drill.}  String your ribbon through those holes & tie.  You can then adhere the two “banners/sayings” to the top & bottom with the scrapbooking adhesive of your choice.  Finally, grab your magnetic tape & cut tiny pieces off the magnetic tape & apply it to the top & bottom of each of the cards….see the pic below.

Last but not least – write down 24 things (on little slips of paper) that you absolutely LOVE about your man!!  Fold them up and put one inside each “cup”!


….and THAT is how you create a “How Do I Love Thee?” surprise for your man!!  :)  I also thought this would be fun to do with your children as well.  You could even use this as a “countdown” to V-Day….starting on January 22 (idea for next year) OR start on February 1st and have it go through most of February….next year, of course!  You could put treats, notes, compliments, etc. inside each cup!  The options are endless!  But THIS year – use it to surprise your man on Valentine’s Day!  Who WOULDN’T want to read 24 compliments about themselves!?!

Magnetic Calendars!!

Adorable Magnetic Calendars!!


With it being January and the beginning of a new year, I set out to find some cute calendar inspiration. I was so excited when I came across this!!!

I am so in love with this calendar!!! Jenn from Clean & Scentsible has several bEaUtifuL themed monthly calendars along with a tutorial

Friday, December 3, 2010

cute mirror


old mirror roadkill rescue
First I taped off the mirror and spray painted the frame black.  Then distressed it a bit.  I'd like to rub a dark gloss onto it, but don't have one available.  When I get some I'll go back and finish off the frame.  
old mirror paint
I don't have a vinyl cutter, or a Cricut, so I planned out the mirror words and printed them off on paper. I ran them through my Xyron machine to turn then into stickers and stuck them together.  I couldn't find my sharp craft scissors so I had to use normal ones.  I cut out all the large words, but without the super small and sharp ones that was the best I could do, still trying to get it done in one day.  
words bathroom mirror
I used bathroom related words and changed fonts and sizes for every word.  After cutting out what I could I took off the backing and stuck it to the mirror.  You can see the smaller words that didn't get cut out.  I'm hoping to go back and re print and cut out those words later.  I used bathroom related words and changed fonts and sizes for every word.  
words cut out sticker mirror stencil
Then I pressed the sticker/paper to the mirror using a credit card, just like you would do with a vinyl stencil.  I didn't want any bubbles that the etching could get through and mess up the words.  
mirro stencil sticker cut out bathroom words
I taped off every part of the frame so the etching couldn't get through.  
mirror frame preperation
And instead of using etching cream I discovered and fell in love with this great new product.  Frosted Glass in a spray can!  Crazy easy, looks just like etched glass AND the best part if I don't like it later I can clean off the "frosted glass" and do something else!  I'm counting it as #71 because what I wanted from this goal was something that looked like this, not necessarily having to use the cream to get it.  Yup a rare picture of me.  Gotta love pictures taken by kids that you find on your camera later.  Like the new cut?  Not that you can see it.  I'll try to remember to take a new picture to update the sidebar one.  
frosted glass spray paint words mirror
It's a smallish basement bathroom so it's hard to get a good angle for a good picture.  You can't really see the writing, but I LOVE it!  It makes the room feel bigger having a mirror on both sides of the room.  And it's super fun having these bathroom mirrors.  

frosted writing on mirror


Bathroom vanity

We were asked recently how we built our master bathroom vanity from the Downing house, pictured below:

I have to admit this is one of my favorite projects ever, and I regretted selling this house mostly because of leaving this bathroom behind. One of the best features, in my mind, was that we raised the obnoxious 30" sink height to an adult scale of 36". Now, if you are not a tall person, by all means leave it at 30, but it felt SO luxurious to not have to bend over 15 feet just to brush my teeth or wash my hands.

I thought we would try our hand at a little tutorial, please go easy on us, this is harder than it seems, especially since everyone is at a different level of understanding when it comes to building. Please ask questions if you need help!

This is more of an intermediate project, mostly because of the tools required, BUT if you have a friend with a table saw, (bribe them to use it... cookies, babysitting) OR if you forgo the mitered edges and just butt the edges together OR use a 4 x 4, this could be a less daunting project. 

There is one tool that will be necessary that you may not have, but is ideal for furniture building, and that is a pocket jig. I just looked it up at Home Depot online and it was on sale for $20.98 usually $30.00. !

The plans are made for a 5' x 22" double sink vanity top, available at most building supply stores. You can customize it as you choose, I am sorry I won't be able to do that for you. 

Supply check lists:

Wood:
16 pieces 3" wide by 3' long wood of choice (legs)
2 pieces 4" wide x 53" long wood of choice (front and back of bottom shelf support)
2 pieces 4" wide x 14" long wood of choice (ends under bottom shelf supports)
2 pieces 4" wide x 18 1/2" long wood of choice, (center support bracing)
2 pieces 6" + wide x 53" long, wood of choice (front and back of tabletop skirt)
2 pieces 6" wide x 14" long wood of choice (ends under bottom of table top skirt)

Bottom shelf 19 3/4" x 58 1/2"

Tools etc.:
Table saw, for mitering legs
Miter saw or Hand saw and miter box, for cutting wood to length
Nail gun or nails and hammer (for putting legs together)
Wood glue (use on joints for strength)
Pocket screw jig (to attach skirt and supports to legs)
Drill (to drill holes and install screws)
Pocket screws (to attach skirts to legs


Instruction sheet:
You may copy this image only for personal use,
it may not be reproduced or posted on any other blog
without author's written consent before use. Thank you.


CUTE book cases

I wonder, do you have one of these book cases? or one very like it?
Wanna give it a face lift? For $20.00 to $60.00 
It's easy.... come check it out. 


I had two of these babies. These cheap bookcases, are like the stepping stones to furnishing your house, it is almost a requirement that you own one at some point in your lifetime. I guarantee that most of you have one, more than one or have had one in the past... Am I right? ...well, maybe you are just cooler than me.

Moving on, for those of you that do have one, I have an idea for you. Actually, I have been working on this one off and on for about a month as part of my craft room makeover. Technically they weren't in the original plans. But, when I banished the exercise equipment from my craft room (see now I don't feel guilt about sitting on my rump crafting all day!!) I had all this extra room.

I decided to find all craft like objects and corral them into one room. ... is it okay to admit I am a bit of a "stuff to craft with" hoarder? And I had these thing in every spare closet... NO more!

Anyway, I had two of these book cases from my last house. Since moving here they had taken up residence in two closets. The other day (Christmas Eve to be exact) I thought it would be fun to have my sewing desk flanked by two book cases, but I am sorry to say, they looked ugly. That and showed too much of my junk.

Hence my makeover, so for your DIY pleasure. Now you too can make that 25.00 bookcase into a thing of beauty! I am not fully done, but when I reveal the full craft room, you'll see it all decked out.

What you need
Hand saw and miter box, or miter saw
4 pieces 6' foot long 1" x 2" mdf or pine plain square boards
wood glue
finishing nails and a hammer
paint
L bracket (to secure bookcase to wall)

(optional stuff)
4 wooden legs and screw plates
Piece of mdf same size as whole base of bottom of shelf unit
Doors-
A piece of 1/2" 4' x 8' mdf board, cut to width and length at the lumber store (I know H.Depot does this)
Small, most inexpensive baseboard approx 10' linear feet per door, 20' total!!
4 hinges
Top- (either)
Crown molding enough to wrap front and sides (optional)
or a piece of the 1/2" MDF (from doors) in the dimensions of the shelving unit plus 2 inches in length and 1 in width
Decorative paper for back

You could go more expensive on the wood, but it really wouldn't prove anything. The book case was only 25.00 after all, and you might as well save the money for something funner! (cause that's a word!)

This sounds a little complicated to begin with, but I promise it is not. I will show you our little scrap book of creating it, then I will show you the breakdown.

The bookshelves and all their junky glory- (there is a blanket in there that I have been crocheting for about 3 years...)


Now start collecting supplies:
If you choose to make doors, you can have them cut at the H.D.

Here are your 1 x 2's (which actually measure 1 1/2" x 1/2" don't ask me why)
Cut them to the lengths explained in worksheet (below).

If you would like to add legs, you will need a base piece that is the same measurements of the whole bottom of the bookcase. This way the weight of the book case won't be concentrated on just the bottom shelf, it will distribute to the sides as well.

You can purchase little legs and screw plates that are easy to install.

Cut the face frame pieces to their proper length according to you bookshelf dimensions. Begin to glue the pieces together at the corners. We clamped our because we own the large clamps, you can just hold them together for a few minutes and then let the wood glue dry for at least 30 minutes minimum. I added the arrows to show you what seams you glue, at each rail.

Now add your moldings to the mdf door.
Using your miter saw to fit it exact. (or as close as you can get)

By the way... I built the doors! I have proof. Dang hot!


We screwed the bookshelf onto the base platform through the bottom shelf (It won't show with doors).
Then nailed the face frame to the front of the shelves.
Now patch holes and caulk all large cracks, then paint.

Hang the doors. We found it was easiest to lay them on their back to hang the doors.

WARNING!!!
You need to attach the bookshelf to the wall with an "L" bracket
to keep it from tipping over on you or any climbing children!!
They usually come with the bookshelf when you buy it.
But if you don't have it you can buy a new one.
The doors make this a little heavy in the front so you cannot skip this step.

I decided to add some color to the back. I am not going to keep this particular paper.
I wanted to try it out til I can buy something else. It just feels a little juvenile, what do you think?

P.S. I didn't waste my time painting the inside of the shelves that are behind the doors,
since they have a laminate finish that looks just fine and is in good shape.

Here it is basically finished.
The final image will be revealed someday when I clean out and organize the craft room all the way!

Feel free to save the instruction for your own personal projects, but you may not reproduce them without my permission. If you would like to link to this project, please contact me! Thanks... We worked hard on this!


Instructions:
1st - Measure your book shelf.
My book shelf is 5' tall x 3' wide x 1' deep. Just to give you an idea. 

2nd - Cut all wood to proper size 
According to your shelf's dimensions!!

3rd Glue Face Frame together, assemble doors.

4th Install legs to base piece, 
and bookcase to base platform.

5th Nail Face Frame to Bookcase, 
Patch, caulk and paint all pieces.

6th Hang doors to face frame

7th Secure Book Case to wall. 
Add any decorative touches you please!